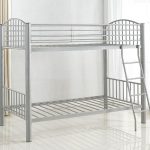
Attaching a headboard to a full metal bed frame can be an easy and rewarding DIY project that enhances the aesthetic and comfort of your bedroom. Whether you're updating your existing bed frame or building a new one, the process of securing the headboard can seem a bit tricky at first. But with the right tools, a bit of patience, and the right approach, you can have your headboard attached in no time.
In this blog, we'll walk you through the steps for attaching a headboard to a full metal bed frame, plus some helpful tips for ensuring a secure and stylish result.

Why Install a Headboard on a Full Metal Bed Frame?
Installing a headboard can not only enhance the appearance of your bed frame but also offer several practical benefits. Here are some reasons why you might want to add a headboard to your full metal bed frame:
1. Increased Comfort: A headboard can serve as a backrest, providing better support when reading, watching TV, or using your phone in bed.
2. Aesthetic Appeal: A headboard adds visual interest to the bed, enriching the overall design of your bedroom.
3. Wall Protection: A headboard effectively prevents the full metal bed frame from coming into direct contact with the wall, preventing wear and scratches.
4. Enhanced Stability: In some designs, the headboard can also improve the stability of the bed frame, preventing wobbling.
How to Choose a Compatible Headboard for a Full Metal Bed Frame?
When selecting a headboard, consider the following factors:
1. Size Compatibility: The width of the headboard typically matches the size of the bed. For example, a standard Full bed headboard should be 54 inches wide, ensuring it fits the frame perfectly.
2. Style Consistency: Try to choose a headboard that complements the style of your bed frame. If your bed frame has a modern minimalist design, a headboard with clean lines, made of metal or fabric, may be a better fit.
3. Installation Method: Some headboards come with pre-drilled holes or brackets for direct attachment to the metal frame. Ensure that the headboard you select is compatible with your bed frame's installation method.
4. Functionality: If you need additional features like extra storage space or a more comfortable backrest, consider a headboard with cushioning or storage capabilities.
How to Attach a Headboard to a Full Metal Bed Frame?
What You’ll Need
Before you start, gather the following tools and materials:
- Headboard (Make sure it's compatible with your bed frame)
- Metal bed frame
- Headboard mounting brackets (if not already included with the headboard)
- Screws and bolts (typically included with the headboard or brackets)
- Wrench or screwdriver (depending on the type of screws or bolts)
- Measuring tape
- Level (to ensure your headboard is straight)
- Drill (optional, for making holes)
Step-by-Step Guide to Attaching the Headboard
1. Check Compatibility
Before getting started, make sure your metal bed frame and headboard are compatible. Most full metal bed frames come with pre-drilled holes, but some older or more unique frames may not align perfectly with the mounting points on your headboard. If the holes don't line up, you may need to purchase a headboard mounting kit that matches the size of your frame or drill new holes.
2. Attach the Mounting Brackets to the Headboard
If your headboard came with mounting brackets, the first step is to attach them to the headboard. These brackets typically come with screws or bolts, and you'll need to line them up with the pre-drilled holes on the back of the headboard.
Align the brackets: Place the mounting brackets on the back of the headboard where the holes are located. Use a measuring tape to ensure that the brackets are even on both sides.
Screw in the bolts or screws: Tighten them into place with a screwdriver or wrench. Make sure they are secure, but don’t overtighten as this may damage the wood or metal.
3. Position the Headboard with the Full Metal Bed Frame
Once the brackets are attached to the headboard, the next step is to position the headboard against the bed frame.
Lift the headboard: Carefully lift the headboard into position, aligning the brackets with the holes on the bed frame.
Ensure the headboard is centered: Use a level to check that the headboard is straight. Adjust as necessary before continuing.
4. Attach the Headboard to the Bed Frame
Now, you’ll attach the headboard to the metal bed frame using the provided bolts, screws, or other hardware. Depending on your frame and headboard, this could involve sliding the bolts through the holes in the brackets and securing them to the frame.
Insert the screws or bolts: Slide the screws or bolts through the pre-drilled holes in both the metal frame and the mounting brackets on the headboard. If your frame doesn’t have the holes, you may need to drill holes or use universal mounting brackets.
Tighten the fasteners: Use a wrench or screwdriver to tighten the bolts or screws. Ensure they are tight enough to keep the headboard securely in place, but avoid overtightening to prevent stripping or damaging the metal.
5. Double-Check the Stability
After the headboard is attached, give it a test to ensure it is securely fastened and won’t wobble. Press gently against the headboard to check for any movement. If there is any wobbling, tighten the screws or bolts further until it’s stable.
6. Add Any Additional Support (If Needed)
If your bed frame doesn’t have a bracket or if the mounting points seem a bit unstable, you can add additional support. Some people use metal L-brackets or additional screws to ensure extra stability. Just be sure that these additions don't interfere with the look of your bed frame or headboar
Tips for a Successful Installation
Measure before drilling: If you need to drill new holes, measure carefully to ensure that the holes line up correctly between the bed frame and the headboard. A tape measure and level are crucial for achieving an even result.
Check for height compatibility: Some bed frames allow you to adjust the height of the headboard. If possible, test different height settings before securing the headboard for optimal comfort and visual appeal.
Consider using a mattress support: If your bed frame has a slatted foundation, placing a piece of plywood beneath the mattress can provide extra support to your headboard and make it more stable.
Use the right mounting kit: If your headboard doesn’t come with a specific mounting kit, purchasing a universal kit designed for metal frames can make the process easier. These kits often include adjustable brackets and hardware to fit most frames.
Avoid overtightening: When securing screws or bolts, be careful not to overtighten them. Overtightening could strip the threads or damage the metal of the bed frame and the headboard.
With these simple steps, you'll have your headboard securely attached and your bedroom looking polished in no time!


.jpg)


