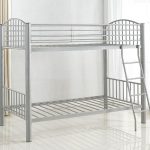
Steel bed frames are popular due to their durability, modern look, and cost-effectiveness. However, over time, they may weaken due to heavy use or poor construction. If your steel bed frame is starting to creak, sag, or feel unstable, reinforcing it can extend its lifespan and improve its stability. In this blog post, we’ll walk you through the steps to reinforce your steel bed frame effectively.
Why Reinforce a Steel Bed Frame?
Before diving into the reinforcement process, it's important to understand why you might need to strengthen your bed frame:
Sagging or instability: Prolonged use or overloading can cause the frame to lose its firmness.
Loud noises: If your bed creaks or makes unsettling sounds, it's usually a sign that the frame is loosening or the connections are weakening.
Uneven weight distribution: Sometimes, steel frames lack sufficient support across the length and width, leading to uneven pressure distribution.
Reinforcing your steel bed frame not only ensures a more comfortable and quiet sleeping experience but also helps avoid potential damage.

Materials You’ll Need
Before you begin, gather the following materials:
- Metal brackets or corner braces
- Steel reinforcement bars (optional)
- Screws and bolts
- Power drill
- Wrenches
- Measuring tape
- Lumber (for additional slats, if needed)
- Rubber pads or felt pads (optional)
Step 1: Inspect the Frame for Weak Spots
Begin by thoroughly inspecting your bed frame. Check for any loose joints, bent sections, or weak points. Pay particular attention to the following areas:
Center support beam: The central beam is crucial for maintaining stability. Look for any signs of sagging or bending.
Corner joints: Check that all corners are securely fastened.
Slats: If your frame uses slats for support, ensure they’re intact and properly aligned.
Once you've identified the weak spots, you can proceed with reinforcing those specific areas.
Step 2: Tighten Loose Bolts and Screws
Sometimes, a creaky or unstable bed frame is simply the result of loose connections. Use a wrench or screwdriver to tighten all bolts, screws, and fasteners. Pay attention to the following:
Legs: Ensure that each leg is firmly attached to the frame.
Cross beams: Tighten the connections between horizontal and vertical supports.
If the bolts are stripped or worn out, replace them with new ones to ensure a tight fit.
Step 3: Add Metal Brackets or Corner Braces
For added reinforcement, install metal brackets or corner braces. These provide extra support at key joints, preventing them from loosening over time. Here’s how to do it:
Measure the joints where you’ll attach the braces to ensure a snug fit.
Drill pilot holes at the points where the brackets will go, making sure not to drill too deeply into the frame.
Attach the brackets using screws and bolts, tightening them securely.
Installing these brackets at the corners or any weakened areas can help stabilize the bed frame and reduce shifting.
Step 4: Install Additional Steel Reinforcement Bars
If your frame is particularly sagging or unstable in the middle, you may want to add reinforcement bars for extra strength. These bars can be added to the middle support to distribute weight more evenly across the frame.
Measure the width and length of your bed frame where the reinforcement bars will be installed.
Cut the steel bars (or have them pre-cut to the appropriate size) and place them evenly along the length of the frame.
Secure the bars with bolts or weld them in place (if you're comfortable with welding). This will provide enhanced structural support.
Step 5: Add Extra Slats for Support
If the bed frame has slats, adding a few more can improve its stability. For this:
Measure the distance between existing slats to ensure the new ones will fit properly.
Cut lumber to the appropriate size and place the new slats parallel to the existing ones.
Secure the slats using screws or nails. This will increase the weight distribution and prevent the mattress from sagging.
Step 6: Add Rubber or Felt Pads
To reduce noise and prevent further wear, you can add rubber or felt pads to the joints where metal pieces meet. This helps to cushion any friction and minimizes the creaking sounds that can occur over time.
Step 7: Test the Frame
Once all reinforcements are in place, it’s time to test the bed frame:
Apply weight gradually: Press down on the frame or lie on the bed to ensure it feels sturdy and secure.
Check for noise: Move around on the bed to see if any creaking or shifting occurs. If the frame remains silent and firm, you've reinforced it successfully.

Additional Tips for Maintaining Your Reinforced Bed Frame
Regular checks: Over time, bolts and screws may loosen again. Periodically check your frame to ensure all connections are still tight.
Use a mattress support: A good-quality mattress foundation or box spring can provide additional support for your mattress and reduce strain on the frame.
Avoid overloading: While your bed frame is reinforced, it’s still important not to overload it with excessive weight.
Reinforcing a steel bed frame is a simple yet effective way to extend its lifespan and improve its stability. By following these steps—tightening loose connections, adding metal brackets or corner braces, installing reinforcement bars, and adding extra slats—you can significantly improve the sturdiness of your frame. With regular maintenance, your reinforced steel bed frame should provide years of comfort and support for your mattress. Happy reinforcing!